Simple Cloud Formation

Introduction
Today I’d like to talk a little bit about infrastructure as code. Infrastructure as code is when you write code to manage your cloud infrastructure. Having your infrastructure set up as code does wonders for your development cycle. The one thing I like the most about it, is that when you make a setting change, you can commit it. No more looking back at the resource settings and trying to figure out the magic checkbox you clicked last week that made things work in QA so you can reproduce it in Production. You just point the code to the Production account and fire it off.
There are a bunch of different tools to facilitate this code. In the past I’ve used Terraform with AWS and a little bit of ARM Templates for Azure. Terraform is interesting because you can use the same syntax across any of the cloud providers. The resource names are still specialized though. In this post, I’m going to talk about Cloud Formation.
What is Cloud Formation
Cloud Formation is just Amazon’s proprietary Infrastructure as Code service. It uses YAML files to configure services in a group called Stacks. The Serverless framework does this in a similar fashion. In fact, you can just drop Cloud Formation configuration right into a serverless template.
AWS Cloud Formation lets you bundle just about any service they offer into one of these Stacks and you can even use nested stacks to organize and compartimentalize your resources. Nested stacks are a bit out of scope for this post, as I just want to show a simple way to setup a project using Cloud Formation and a couple other AWS offerings to host a simple S3 static site.
The Components
To set up an S3 static site, you’re going to need a couple things in AWS. We’re going to use an S3 Bucket, Cloud Front, Code Build and a code repository. I recommend GitHub for the code repository. I’m going to break down the sections of a Cloud Formation template to build these resources in AWS automatically. The repository I made for this post is also available on GitHub. You can fork that as a simple jumping point static site, just to get the pipeline of things working.
First, lets check out the way a Cloud Formation (CF) template is set up. There are a few relevant top level sections to use for this purposes of this post. First, lets take a look at the Parameters section:
Parameters:
  ProjectName:
    Type: String
    Default: SimpleCloudFormation
    Description: The name of the project we want to make.
  BucketName:
    Type: String
    Default: simple-cloud-formation
    Description: The name of the bucket your site will be held in.
  ProjectSourceLocation:
    Type: String
    Default: "https://github.com/ScienceVikings/SimpleCloudFormation.git"
    Description: Location of the code for CodeBuild to utilize.
Here we are setting up parameters that we can use in the resources section of the rest of our files. The ProjectName is the name of our project we’ll use for the Stack and other resource names where capital letters are allowed. For your purposes, feel free to change any Default values to whatever you’d like to call them.
BucketName is the name of our S3 bucket we’ll be using for this project and the ProjectSourceLocation is the code repository we want our CodeBuild service to pull things from.
Now, lets look at the resources. Lets see how we can set things up to make an S3 bucket using CF.
Resources:

  S3Bucket:
    DeletionPolicy: 'Delete'
    Properties:
      AccessControl: 'Private'
      BucketName: !Ref BucketName
    Type: 'AWS::S3::Bucket'

  S3BucketPolicy:
    Properties:
      Bucket: !Ref S3Bucket
      PolicyDocument:
        Statement:
          - Action:
              - 's3:GetObject'
            Effect: 'Allow'
            Principal:
              CanonicalUser: !GetAtt CloudFrontOriginAccessIdentity.S3CanonicalUserId
            Resource:
              - !Sub 'arn:aws:s3:::${S3Bucket}/*'
    Type: 'AWS::S3::BucketPolicy'
The resources section will only show up once in this file and the resources themselves will be children of that section. As we can see, we’re creating two resources. One is the actual S3 bucket to hold our site and the other is a security policy that will give CloudFront, a service we’ll talk about next, access to get the objects in that bucket.
Notice the weird way the BucketName is used when describing the S3Bucket resource with !Ref BucketName. This references our parameter from the section before, this way we can change things in one spot instead of a bunch of places all over the file.
You’ll also notice that there is another spot in the policy that has !Sub 'arn:aws:s3:::${S3Bucket}/*'. The !Sub stands for substitution. Whatever is in the ${} gets put in that spot. We put S3Bucket because most resources have a default property that can be referenced or substituted and for S3 buckets it’s the name, so this will replate ${S3Bucket} with whatever name we set for our bucket.
Now lets look quickly at how the resources are set up. You’ll see that each one starts with how we want to reference the resource in the file, so S3Bucket is our file’s name for that resource. It isn’t used outside the template. Each resource also has a Type field. This describes what kind of resource we’re creating. As you can see for our S3Bucket, it’s Type is 'AWS::S3::Bucket'.
All the other sections depend on the resource you want to create. The reference for all the resources CF can create is somehow both huge, yet sparse and difficult to navigate, but here is the reference anyway.
Lets take a look at the Cloud Front portion of the template next. Cloud Front is how your site gets distributed and served out from S3. We’re going to point it to our S3 bucket, tell it the root object name and set up permissions so that only Cloud Front can have access to the S3 bucket and it’s contents are not made public directly.
  CloudFront:
    Properties:
      DistributionConfig:
        # Aliases: [ "mysite.example.com" ]
        # ViewerCertificate:
        #   AcmCertificateArn: !Ref ACMCert
        #   SslSupportMethod: sni-only
        DefaultCacheBehavior:
          AllowedMethods:
            - 'HEAD'
            - 'GET'
          CachedMethods:
            - 'HEAD'
            - 'GET'
          Compress: false
          DefaultTTL: 86400
          ForwardedValues:
            Cookies:
              Forward: 'none'
            Headers:
              - 'Origin'
            QueryString: false
          MaxTTL: 31536000
          MinTTL: 86400
          TargetOriginId: !Sub 's3-origin-${S3Bucket}'
          ViewerProtocolPolicy: 'redirect-to-https'
        DefaultRootObject: 'index.html'
        Enabled: true
        HttpVersion: 'http1.1'
        IPV6Enabled: false
        Origins:
          - DomainName: !GetAtt S3Bucket.DomainName
            Id: !Sub 's3-origin-${S3Bucket}'
            OriginPath: ''
            S3OriginConfig:
              OriginAccessIdentity: !Sub 'origin-access-identity/cloudfront/${CloudFrontOriginAccessIdentity}'
        PriceClass: 'PriceClass_All'
    Type: 'AWS::CloudFront::Distribution'

  CloudFrontOriginAccessIdentity:
    Metadata:
      Comment: 'Access S3 bucket content only through CloudFront'
    Properties:
      CloudFrontOriginAccessIdentityConfig:
        Comment: 'Access S3 bucket content only through CloudFront'
    Type: 'AWS::CloudFront::CloudFrontOriginAccessIdentity'

  # ACMCert:
  #   Type: "AWS::CertificateManager::Certificate"
  #   Properties:
  #     DomainName: "mysite.example.com"
  #     ValidationMethod: DNS
DistributionConfig is the big section here, containing many sub-sections. You’ll notice the part that is commented out. This is only used if you’re setting up your site to use a domain or subdomain that you own. While out of scope for this post, I wanted to put it in there in case anyone needed it. It references an ACMCert resource that is also included, but commented out below the Cloud Front resource.
A lot of this template is quite standard, we set our allowed HTTP methods to be HEAD and GET. You may need OPTION here for some single page application frameworks, but for something like ReactJS, you should be fine.
A couple important bits are the TargetOriginId and the Origins section. This section tells Cloud Front which S3 bucket we’re using for our website and how to handle permissions for that bucket. The !GetAtt S3Bucket.DomainName gets the domain name of our S3 bucket and the Id needs to be the same thing we used for TargetOriginId in the DefaultCacheBehavior section.
The OriginAccessIdentity lets Cloud Front serve the data from that bucket as a website and defined with the AWS::CloudFront::CloudFrontOriginAccessIdentity type in the CloudFrontOriginAccessIdentity resource.
The last bit of the resource section I’d like to talk about are the components needed to set up CodeBuild. CodeBuild is part of the CI/CD services AWS has to offer and will allow us to build and deploy our application right once we commit it. Be warned, this section is big. But, it’s big because there are a lot of descriptive policy statements that you need set up just right for CodeBuild to have access to S3. Here are the CodeBuild resources.
CodeBuild:
    Type: AWS::CodeBuild::Project
    DependsOn: [S3Bucket, CodeBuildRole]
    Properties:
      Name: !Ref ProjectName
      EncryptionKey: !Join ["",["arn:aws:kms:", !Ref "AWS::Region", ":", !Ref "AWS::AccountId", ":alias/aws/s3"]]
      ServiceRole: !GetAtt [CodeBuildRole, Arn]
      Source:
        Type: GITHUB
        Location: !Ref ProjectSourceLocation
        GitCloneDepth: 1
        # Auth:
        #   Resource: !Ref CodeBuildSourceCredential
        #   Type: OAUTH
      Artifacts:
        Type: S3
        Location: !Ref S3Bucket
        Name: build
        Packaging: NONE
      Environment:
        Type: LINUX_CONTAINER
        Image: "aws/codebuild/standard:4.0"
        ComputeType: "BUILD_GENERAL1_SMALL"
        ImagePullCredentialsType: CODEBUILD
        PrivilegedMode: true
      Triggers:
        Webhook: true
        FilterGroups:
          -  - Type: EVENT
               Pattern: "PUSH, PULL_REQUEST_MERGED"
               ExcludeMatchedPattern: false

  # CodeBuildSourceCredential:
  #   Type: AWS::CodeBuild::SourceCredential
  #   Properties:
  #     AuthType: PERSONAL_ACCESS_TOKEN
  #     ServerType: GITHUB
  #     Token: "{{resolve:secretsmanager:MySecret/Token:SecretString:MyAccessToken}}"
First, we have an actual CodeBuild project. Pretty straight forward, but one thing new to this is the DependsOn field. This field lets you tell CF that the listed resources need to be built before this one can be. This lets you control the creation flow of your stack to make sure you have the resources you need before trying to build something that won’t work without them.
Under the Properties section, you can see where we use the ProjectName parameter to set the project name. The EncryptionKey is doing something we’ll see a lot of in the CodeBuild resources. It needs to build an ARN using our region and account id. The easiest way to do it for me was to just make a list of strings to join together. You’re probably thinking, “but Justin, that doesn’t look like YAML!” and you’re right, it’s not. YAML is a superset of JSON, so you can use JSON instead of YAML anywhere in a YAML document! Sometimes YAML can be lengthy and difficult to understand when doing things with arrays, so I like to pull stuff like that back into JSON format.
Lets disect what it’s actually doing though, so we can understand what is going on. Here is the statement: !Join ["",["arn:aws:kms:", !Ref "AWS::Region", ":", !Ref "AWS::AccountId", ":alias/aws/s3"]]
What is this statement saying? Well, the !Join function takes and array where the first item is the separator and the second item is an array of the things you want to join. So, what do we get in the end? We’ll get arn:aws:kms:<our region>:<our account id>:alias/aws/s3.
The ServiceRole key is referencing the policy document we’ll be using to give CodeBuild the permissions it needs to put things in S3 and do the various logging things it needs so we can see how our builds are doing in real time!
Now, lets take a look at the Source section. This is where we tell CodeBuild which repository we want to pull our code from. You’ll notice the commented out Auth section. This is to be used if your repository is private. It references the CodeBuildSourceCredential resource, which is also commented out below. I’m using GitHub, so in that section you’ll see and example of how to use a Personal Access Token to authorize CodeBuild to clone your repository.
The Artifacts section tells CodeBuild where the outputs of your build are going to be located. We’re going to be syncing our artifacts in the buildspec.yml build file of the repository so this part is mostly there for an example. The next section, Environment is pretty straight forward, it is where you tell CodeBuild what type of environment you need to build your project.
Finally, the Triggers section tells CodeBuild to set up a webhook with your source repository so that when you commit your code it will automatically build the project. You can set up different trigger types as well, I used the PUSH and PULL_REQUEST_MERGED events here.
When CodeBuild builds, it looks for a buildspec.yml file as a build template. This is basically a set of sections that contain shell commands to run in your environment. For this, we’re just syncing things up with S3.
version: 0.2

phases:
  build:
    commands:
      - set -e
      - mkdir ./build
      - cp ./public/** ./build
      - aws s3 sync ./build s3://simple-cloud-formation
The steps go like this: Set up some error handling with the set -e then make a build directory, copy the site to the build directory and then sync it with our project bucket.
The final resource we need is our CodeBuild policy.
CodeBuildRole:
    Type: AWS::IAM::Role
    Properties:
      RoleName: !Join ["",['CodeBuild-', !Ref ProjectName]]
      Path: /service-role/
      Policies:
        - PolicyName: !Join ["",['CodeBuildBasePolicy-', !Ref ProjectName]]
          PolicyDocument:
            Statement:
              - Effect: Allow
                Resource:
                  - !Join ["",["arn:aws:logs:", !Ref "AWS::Region", ":", !Ref "AWS::AccountId", ":log-group:/aws/codebuild/", !Ref ProjectName]]
                  - !Join ["",["arn:aws:logs:", !Ref "AWS::Region", ":", !Ref "AWS::AccountId", ":log-group:/aws/codebuild/", !Ref ProjectName, ":*"]]
                Action:
                  - "logs:CreateLogGroup"
                  - "logs:CreateLogStream"
                  - "logs:PutLogEvents"
              - Effect: Allow
                Resource:
                  - !Join ["",["arn:aws:s3:::", !Ref BucketName]]
                  - !Join ["",["arn:aws:s3:::", !Ref BucketName, "/*"]]
                Action:
                  - "s3:PutObject"
                  - "s3:GetBucketAcl"
                  - "s3:GetBucketLocation"
                  - "s3:ListBucket"
      AssumeRolePolicyDocument:
        Version: 2012-10-17
        Statement:
          - Effect: Allow
            Principal:
              Service:
              - codebuild.amazonaws.com
            Action:
              - 'sts:AssumeRole'
This section can be intimidating, but if we break it down into parts we can understand what is going on. First, we have the RoleName which is, simply, the name of our new role we’ll be giving CodeBuild. The Path is where it’ll live in IAM. The meat of this is in the Policies section.
With policies, you are effectively letting resources have access to do actions on other resources. To do this, you need to exclaim the resource you want to allow the action on and all the actions themselves. We only need two policy statements to get what we need. The first one is allowing logging for CodeBuild. It is a must have to see the outputs of your build and tell if anything is going wrong.
The next one is for our S3 bucket. This is allowing our sync command from the build to sync up our files with the S3 bucket we’re using for our site.
The final section of the template file is the Outputs section.
Outputs:
  CloudFrontDomainName:
    Value: !GetAtt CloudFront.DomainName
  CloudFrontId:
    Value: !Ref CloudFront
This section just tells CF what information you want it to show you in the Output tab for easy access to things like the domain name assigned to your new CloudFront instance.
Building the Stack
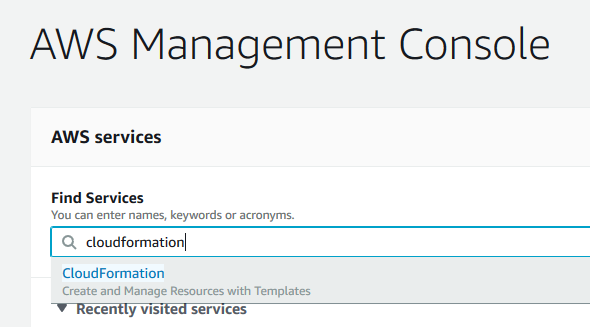
Finally, we need to just put it all together. AWS can be a bit confusing, we use the search functions to find the Cloud Formation service.
Next, you’ll be presented with the list of stacks you already have, with a Create Stack button on the right. Go ahead and click that.

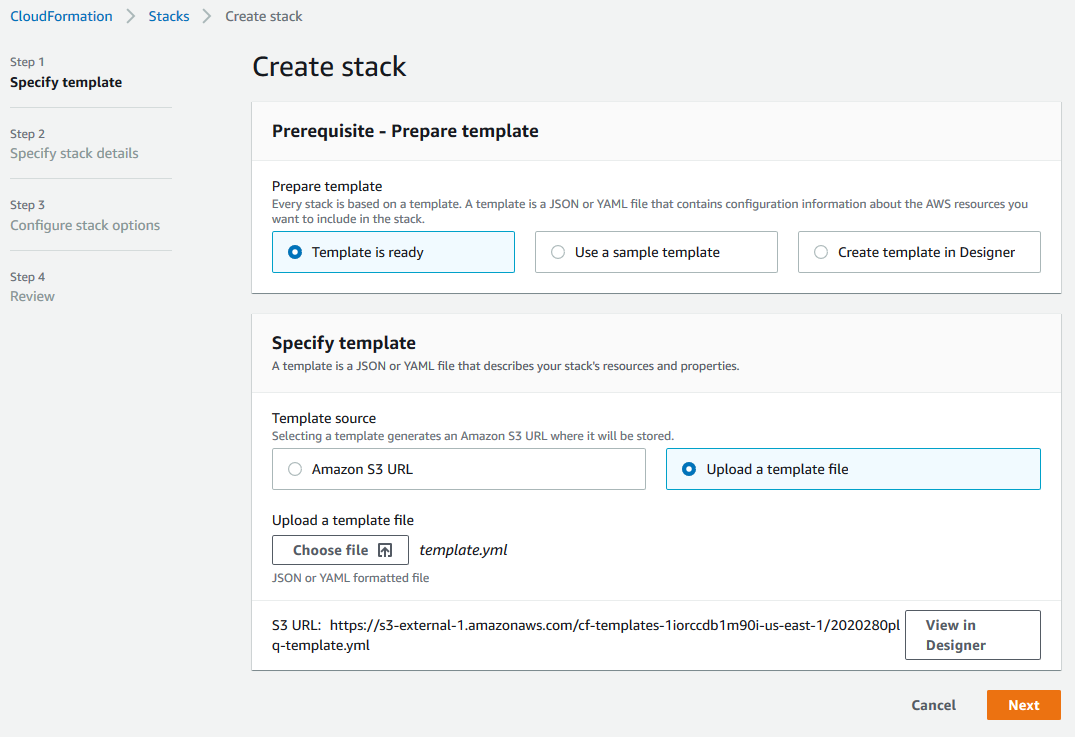
You’ll be presented with the initial screen of the stack creation wizard. We just built our template, so we’ll choose the Template is ready option in the Prerequisite section and the Upload a template file in the Specify template section. Click the Choose file button and choose the template.yml file we created above.
One of the most confusing and frustrating parts of Cloud Formation, outside of creating the template itself, can be when you get an error in your template.
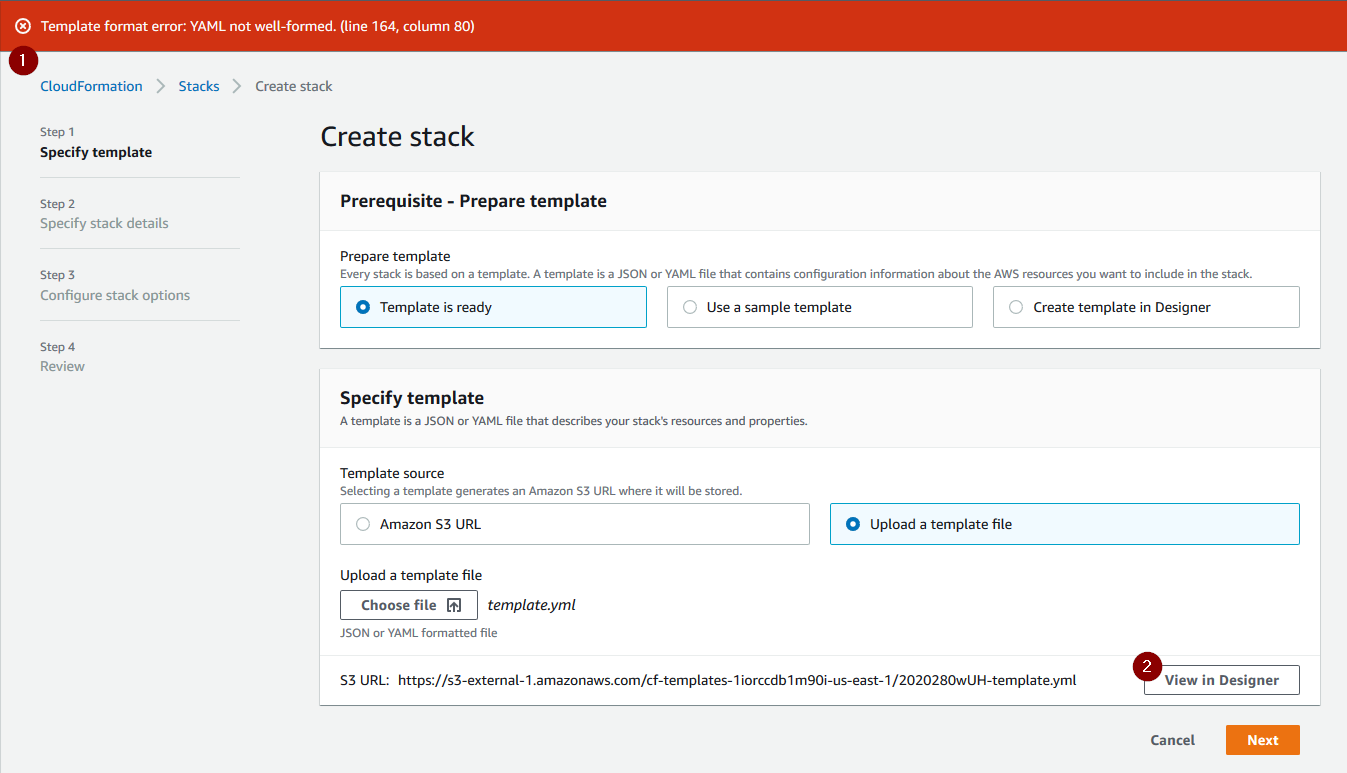
Now, it tells you the line and column number of the error, but as we all know that can rarely be trusted. What I found useful when getting the dreaded Template format error was to actually click the View in Designer button. It actually explains what is wrong with your template more in depth in the Messages section on the bottom right.
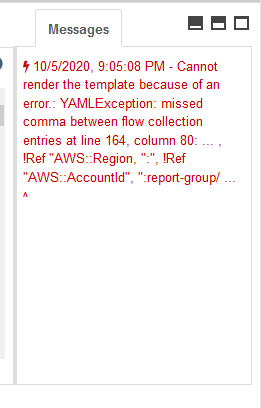
This is extremely useful information that I wish AWS would just show somewhere on the first screen, but alas, they do not.
Once you have a passable template, you’ll get to a screen that will show the parameters it pulled from the template file and ask you to name your stack. After you come up with a name, just click Next.
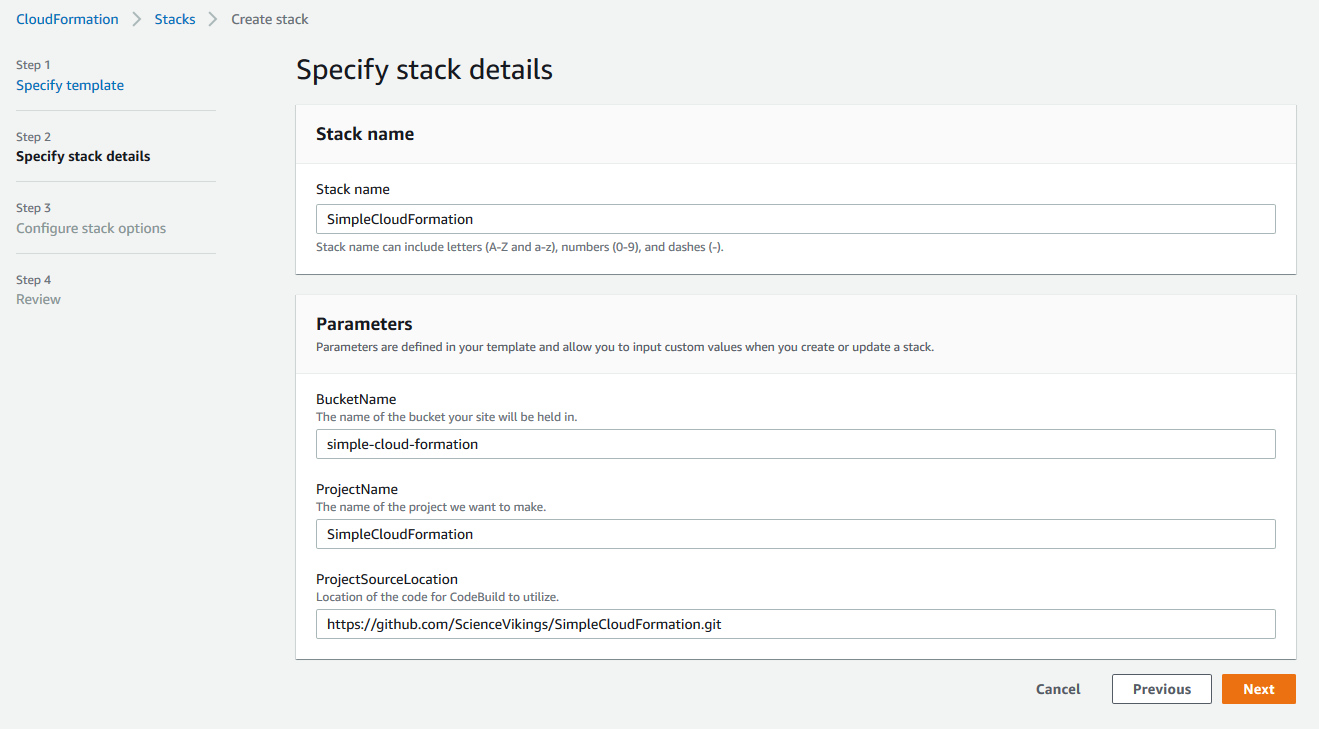
Here we have other options. If you need anything fancy, you can set it up here but I would recommend checking out how to do it in the template file itself so you can keep record of it in code. I usually just scroll to the bottom and click Next.

Finally, you get a chance to review the stack you’re going to create. You’ll need to scroll down to the bottom and check off the I think I know what I'm doing checkbox before you can start the actual stack creation.
Now, we should see our stack build in progress!
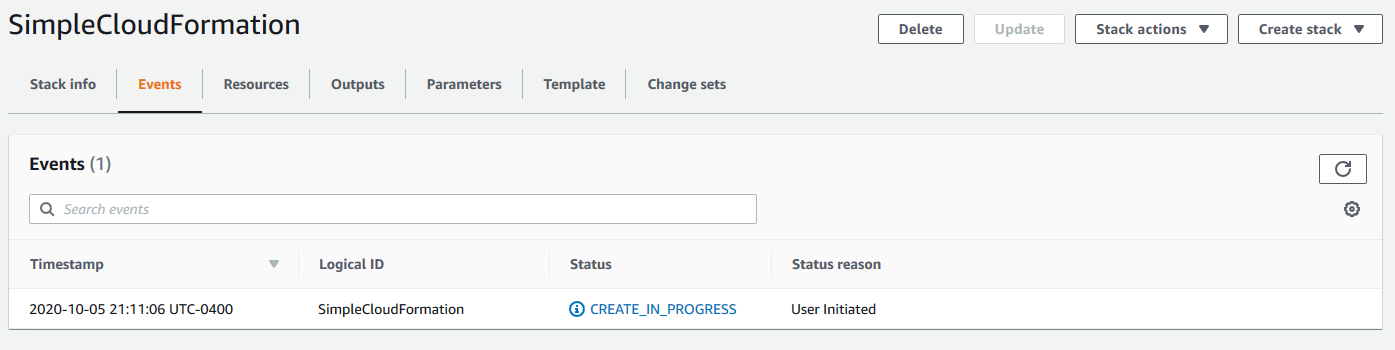
There can be errors here as well, but if there are, CF will do its best to roll things back to the state it started in. It’s pretty good at explaining what went wrong and why, which will show up in that Events section.
Does it work?
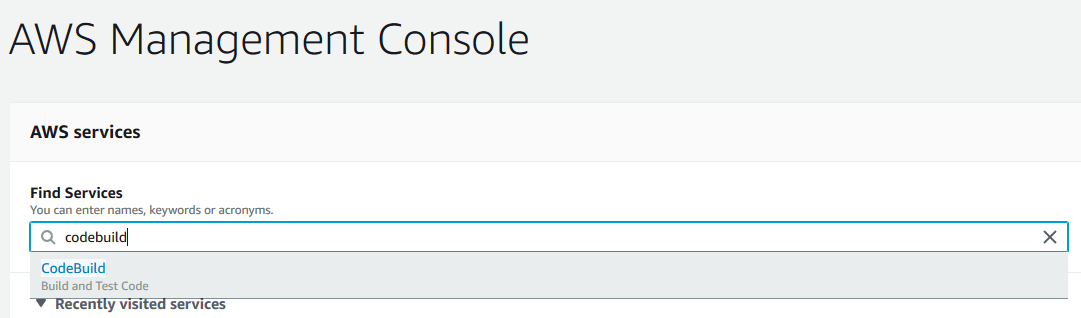
Lets find out! Commit your code to the repository you specified in your template file, and search up CodeBuild in the services search in AWS.
Here, we should see a list of projects and you can click the one that Cloud Formation made for you.
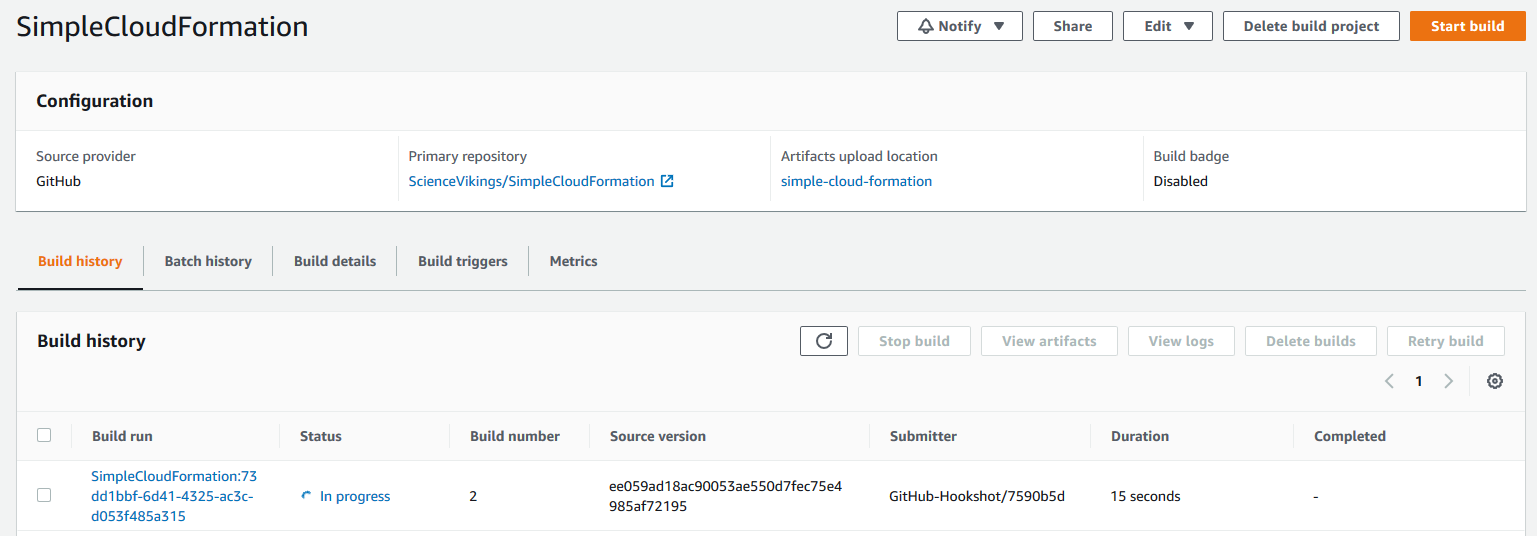
Clicking the link of your projects build in progress will give you a button to Tail logs and you can see what CodeBuild is doing, as it does it. Once your build succeeds, check out the URL that your stack put in the output section and you should see your new site!
We did it!
Alright, so, that was a lot of stuff. We wrote a giant looking template file that builds an S3 bucket, a CloudFront resource, a CodeBuild project and all the crazy policy stuff around it. We went into how to run that template right in AWS and make sure it’s all working correctly. I hope that the template run down and the companion repository can be a good starting point for new projects using Cloud Formation. I’m planning on doing some more around this topic focusing on certain resources themselves and helping to enhance a basic site, so stay tuned!