Getting an Apple certificate from Windows

To build an app for the App Store, you need a few things. An identifier and a signing certificate are the main ones. If you’re using something like Azure DevOps to build an app for iOS, you may not have a mac to follow Apple’s guides to generating a certificate. In this post I’m going to explain how to get an Apple certificate from a Windows machine.
Getting a certificate
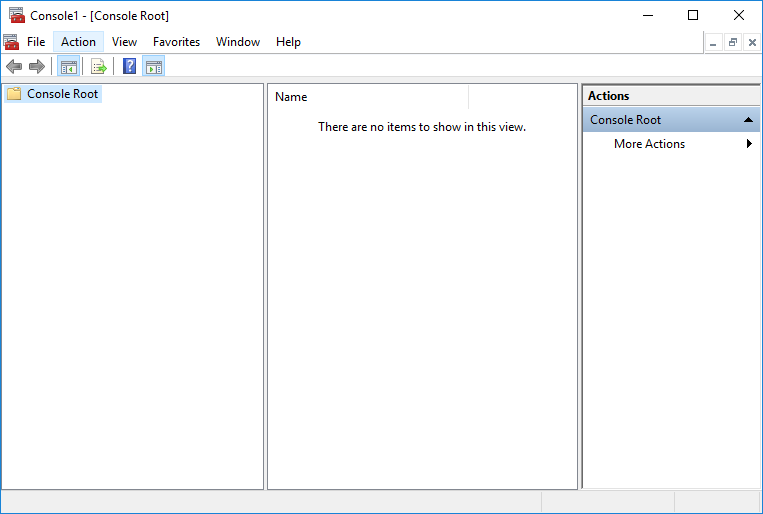
Step one is to open the Microsoft Management Console (mmc). Open up a run dialog with win+r and type mmc and hit enter. You should get something like this:
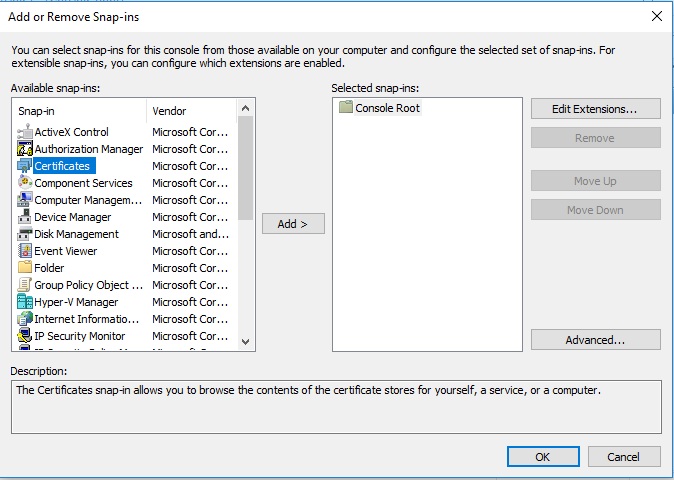
From there, go to File > Add/Remove Snap-in, and find and add the Certificates snap-in. You will receive a prompt asking for which account to do this for, select Computer Account and Local Computer
Next, open up the Certificates tree, right click Personal and follow the context menu through All Tasks > Advanced Operations > Create Custom Request
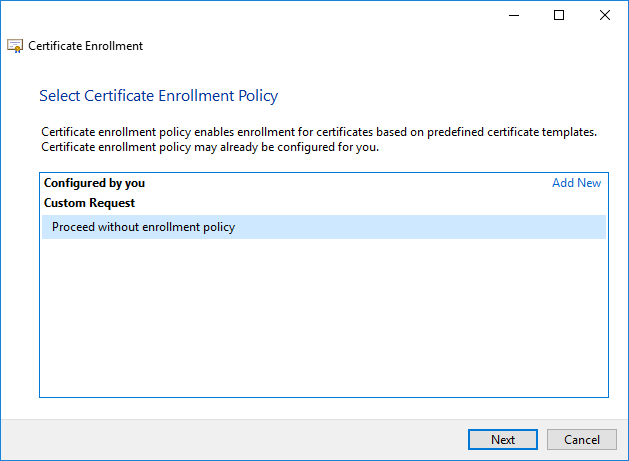
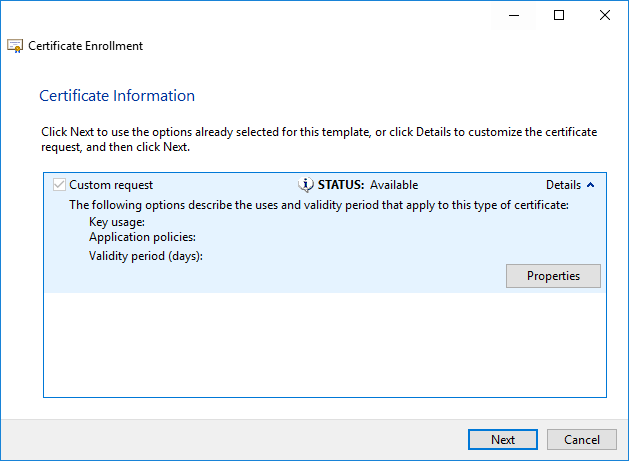
Follow along the dialog and select Custom Request > Proceed without enrollment policy
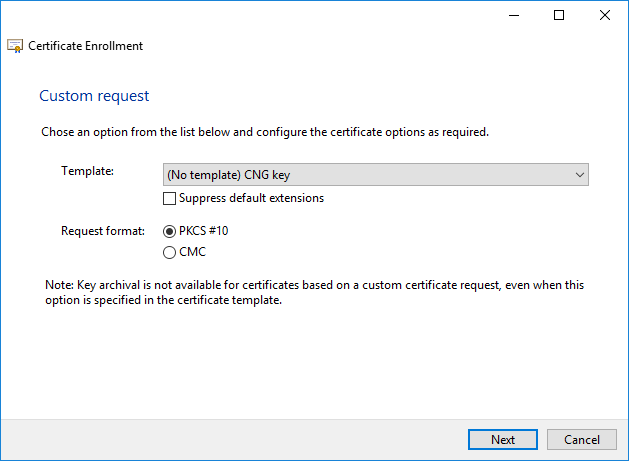
Choose the (No template) CNG key option in Template and the PKCS #10 option for Request format.
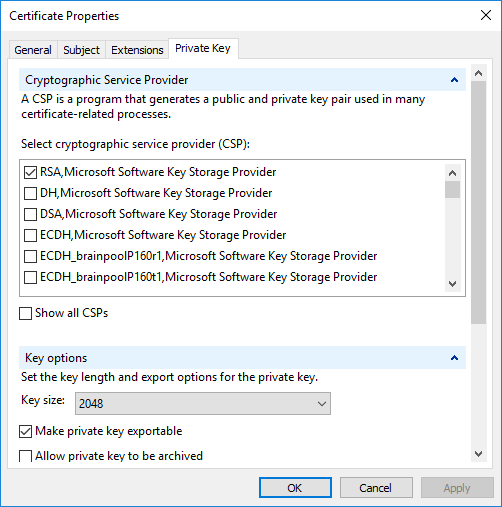
Now we need to make sure the key size is correct. Click the tiny arrow next to Details and click the Properties button.
From there we need to make sure we’re getting a RSA key of length 2048. Select your settings as shown in the screenshot below
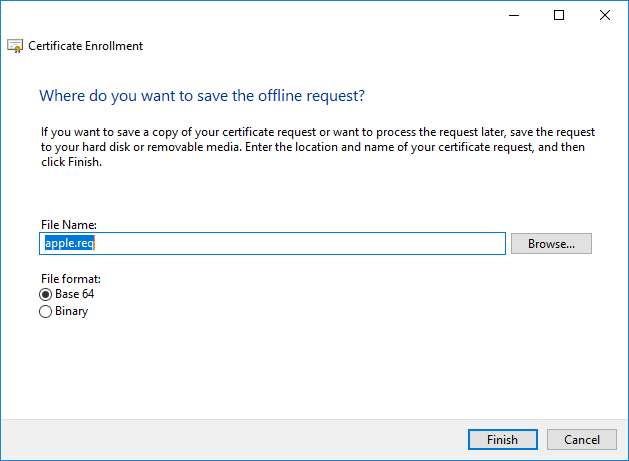
Finally, save your request in the Base 64 file format.
Now upload it through developer.apple.com and download your new certificate.
Exporting the private key
Now that you have your certificate, go ahead open it and click the Install certificate button. Install the certificate to the local computer. Choose the Personal store to make it easier to find. Next, back in the management console, refresh your Certificates store and find the certificate you just installed. Right click it and select All Tasks > Export.
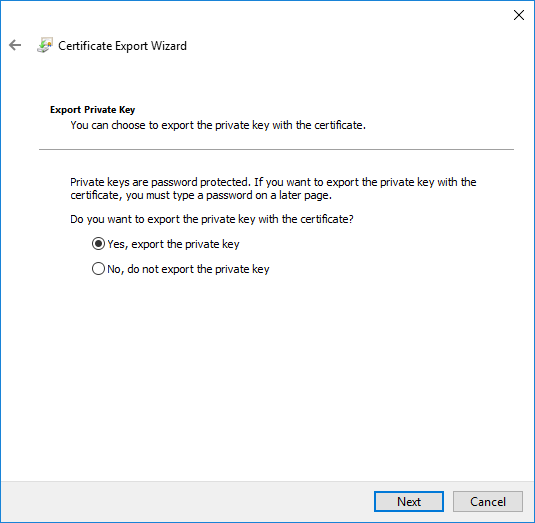
Keep the default settings on the private key export. Be sure to export it as a .pfx file, which happens to be the same thing as a .p12 file.
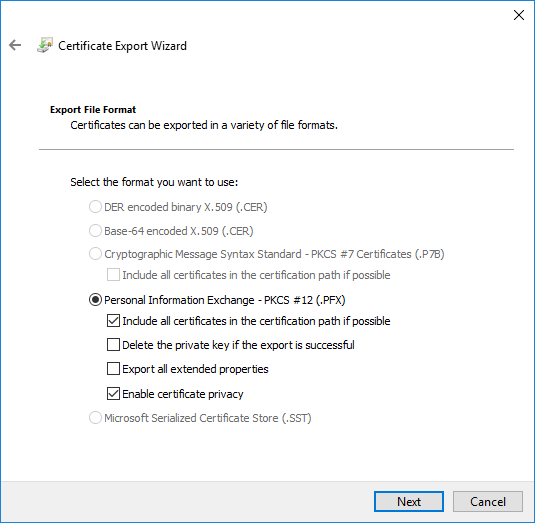
Next, give it a password and set the encryption to TripleDES-SHA1

Then, select the filename to export it as, and you’re done! Now you can use your .pfx file for build machines wherever you need.
Security Implications
An important factor to realize with exporting a certificate is that this is your private key. If someone has your private key, they can pretend to be you. Do not commit this to source control and only store them in secure locations.