Building a Cordova project in Azure DevOps
I’ve been working on yet another app for a personal project that I plan on releasing for Android and iOS. I found myself in a pickle when it came to actually building the artifacts for the Apple App Store.
I had no actual mac to build it on! Alright, so a quick search shows that if I want something remotely useable for this, I’m going to drop between $400-$800 dollars on a build machine. That’s quite the investment for a side project.
In my day job, I use Azure DevOps a lot. I didn’t know anything about it until I started this job, and now I’m in love with it and don’t know how anyone gets anything done without it.
Then, recently, I realized that I can have a macOS build agent in my build pipeline in Azure DevOps… for free! Now, I usually write my apps in Ionic, a mobile-hybrid platform that uses Cordova so, this post will be a guide in setting up an Azure DevOps build pipeline for an Ionic project that produces artifacts for the App Store.
In this post, I’m going to assume you already have an Azure DevOps project setup, and the code for your mobile build stored in source control such that Azure DevOps can access it.
The Prep
If you’ve ever built an app for the App Store before, you know you’re going to need to do a few things before anything will build. Setup your App IDs and signing certificates now. If you don’t own a mac and need to get a certificate from Apple, check out my blog post here. You will also need a provisioning profile for the app you’re creating.
You’ll need your private key for signing the app. There are security implications to be aware of when dealing with private keys. If someone has your key, they can sign things as you and you don’t need that kind of negativity in your life.
Lucky for us, Microsoft has a solution. We’ll use Azure DevOps secure file library. You can find this section under Pipelines and the tab Secure files. Upload the file to your library so we can use it later. This is a good place to store your provisioning profiles as well. We’ll also need the password for the key, we’ll store this as a secure variable in the pipeline.
The Build Pipeline
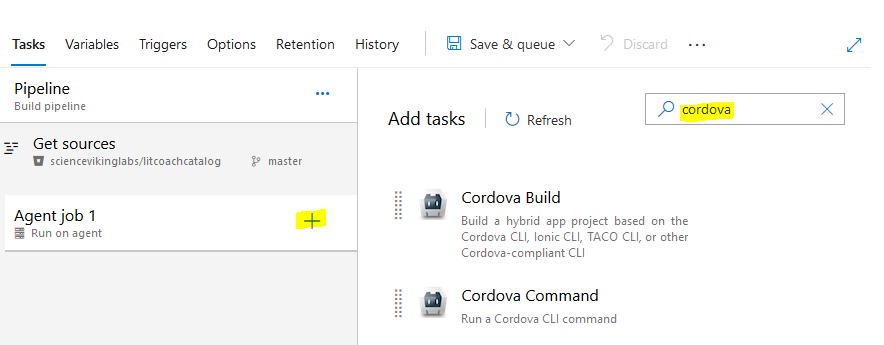
We’re going to need an extension to help us along. Lucky for us, Microsoft created a Cordova Build extension for the build pipline! You can install that here. You can also find this by clicking the shopping bag looking icon in the upper right of Azure DevOps and clicking Browse Marketplace then searching for Cordova.
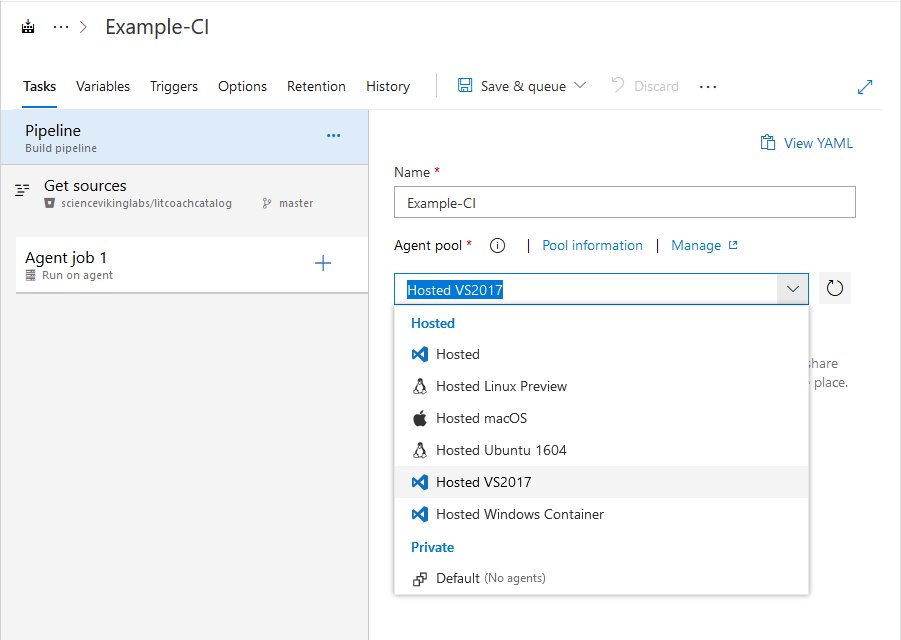
Now, we’re going to create a new build pipeline. Select where your source repository is and the branch you want to build from, then continue. There are multiple sources to choose from, internal Azure DevOps, GitHub, Bitbucket and even some arbitrary external git resource.
Next, you’re going to want to select Hosted macOS as the agent pool.
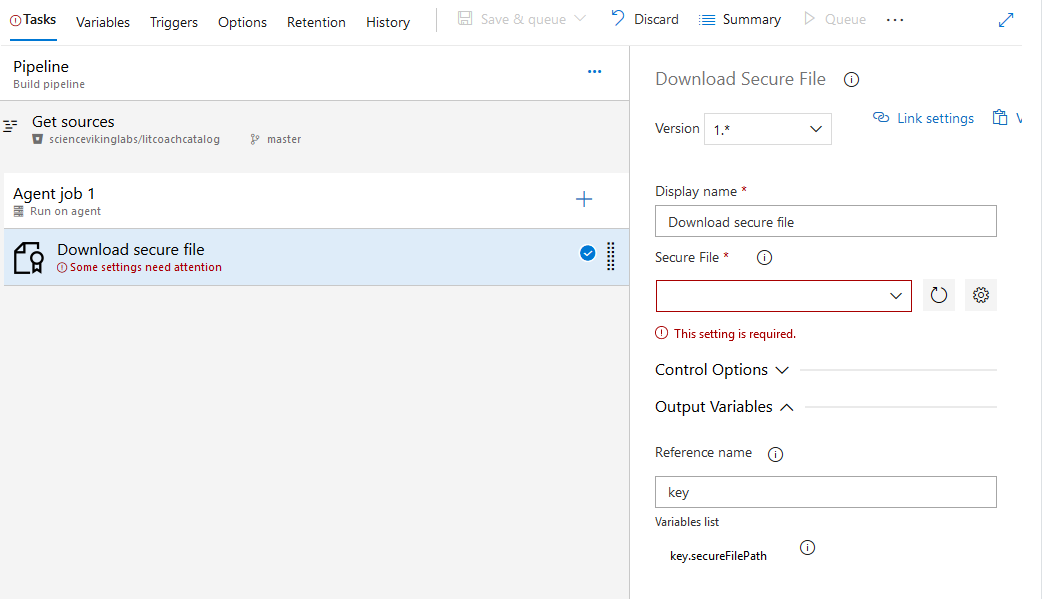
We’re going to need our key we stored in the library so in the Agent job 1 band, select the + to add a task. Search for Download Secure File and add that task, then choose the key from the Secure File drop down. You’ll also want to give it a reference name in the Output Variables section so we can reference it later. The variable we’ll use to get the location of the file is $(key.secureFilePath).
Setup that same task again, but for your provisioning profile.
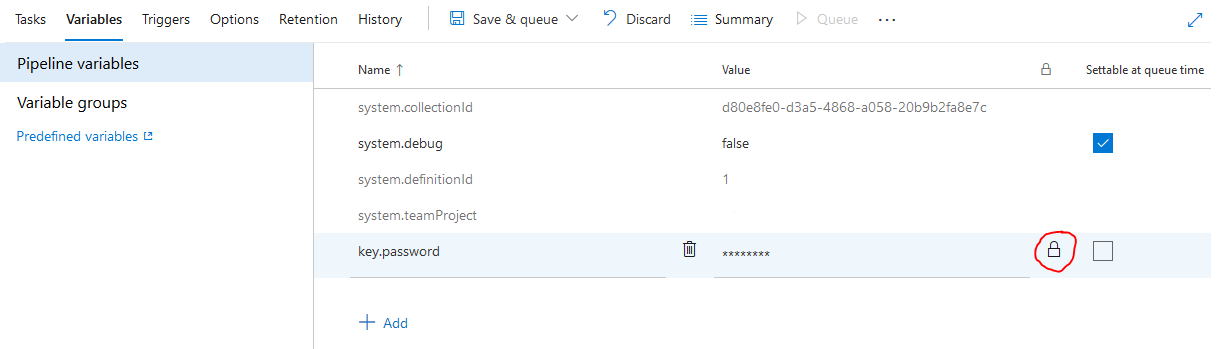
We need to make sure we can store the password for the key securely. Choose the Variables tab, and click the add button. The name you give this will be accessed as the variable. For example, if you name it key.password you’ll use it as $(key.password). Be sure to click the lock icon to secure the variable.
This next part may be optional depending on how your project is setup. For a directory to be considered a Cordova project, a piece it needs is a www directory. I personally do not commit this directory, because it gets regenerated on builds. Therefore, I had to add a Command Line task to generate this directory. You may or may not need this step. If you get an error saying, This is not a Cordova project directory then you should try this step.
Now, back in the Tasks tab, search for the Cordova Build task and add it.
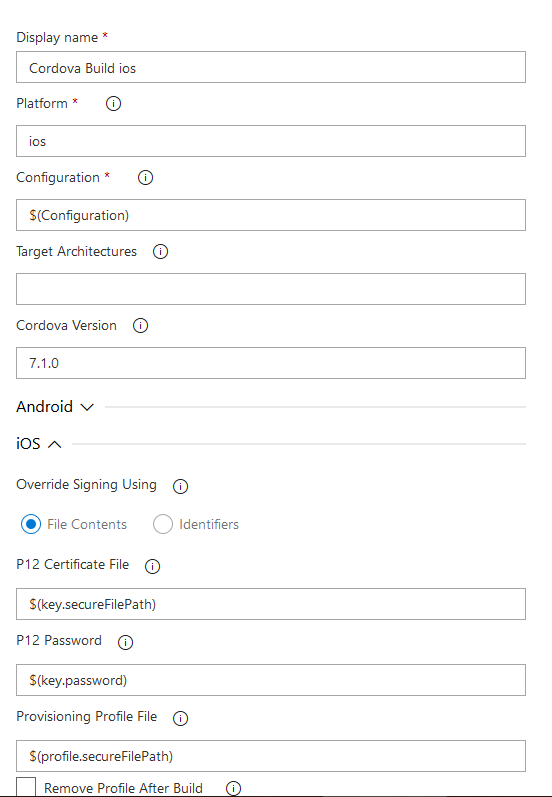
In the Cordova Build task options, set the Platform to ios. You can try leaving the cordova version blank to use the latest version. My local version at the time of writing this was 8.0.0 so I tried using that.
When I built after doing this, I had to set my Cordova version back to 7.1.0. I tried 8.0.0, but got an error saying Cannot read property 'fail' of undefined and setting the cordova version back was the solution.
Expand the iOS section of the options and fill in the certificate file, password and provisioning profile fields with the secure items we setup earlier. Once you’re done, the options should look something like this:
Another thing you need when building iOS Apps is the need of a build.json file. This is required to set the correct development team and provisioning profile UUID for exporting the app files for consumption. My file lives in the root directory and looks like this:
{
  "ios": {
    "debug": {
      "developmentTeam": "APPLE_TEAM_ID",
      "provisioningProfile": "PROVISIONING_PROFILE_UUID"
    },
    "release": {
      "developmentTeam": "APPLE_TEAM_ID",
      "codeSignIdentity": "iPhone Developer"
    }
  }
}
To find the profile UUID you can open the file in a text editor and look for <key>UUID</key>. The string under that key will be your profile’s UUID.
My final pipeline looked like this:
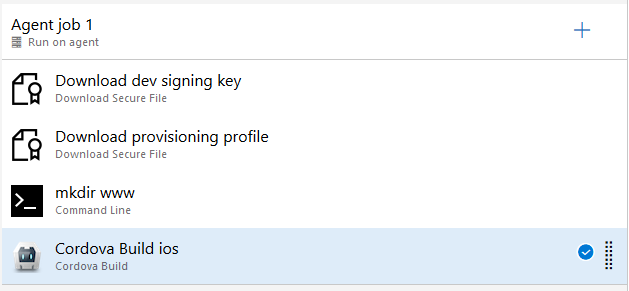
Once your config files and tasks are all in place, save and queue up that build!
Conclusion
As you can see, Microsoft is working really hard to open up a devops lifestyle for mobile devs. It has come a very long way from when I first started using Ionic, Cordova and AngularJS. Things still aren’t as smooth as just dropping in a task and running, but they are getting much closer.
This is a very rudimentary intro to the build process for an iOS build on Azure DevOps. A true project will probably have a lot of other tasks like, changing API endpoints depending on the build type, pushing artifacts up to TestFlight for testing and other house keeping items. I hope this helps you get started. Good luck!